 I would argue that the single biggest reason why most golfers have slow swing speeds is because they don’t have a proper golf swing sequence.
What does that even mean?
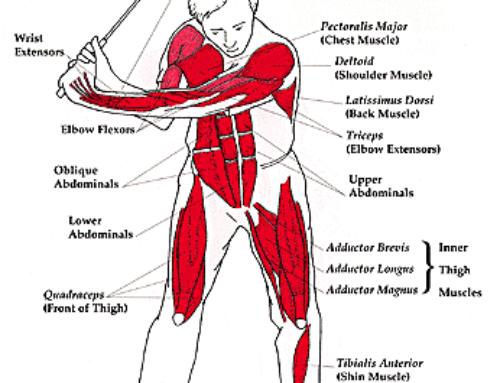
In just about any athletic movement pattern, there is a kinematic sequence that must occur to maximize performance.
Whether you throw a discus, perform power snatches, or perform jumping spinning back kicks in kickboxing, there is a movement pattern that allows the athlete to generate the most power based on their own physical abilities.
The golf swing is no different.
Accomplished golfers and decent amateur players can hit a golf ball much further than most because they have effectively mastered the proper golf swing sequence, aka, the kinematic sequence of the golf swing.
The Kinematic Sequence is simply an efficient sequence of motion in a skilled golf swing. You can read more on the technical details at MyTPI.
There are efficient sequences of motion in other sports that involve throwing motions such as pitching a baseball or throwing a discus.
You can find them in martial arts movements as well, from simple punches to more complex spinning kicks.
These motions are often taught by breaking them down into small sections, particularly if they are very complex movements like the golf swing.
Also, having the proper golf swing sequence has nothing to do with how your swing actually looks.
According to TPI (Titleist Performance Institute), Tiger Woods and Jim Furyk have very similar Kinematic Sequences. Yet, their swings couldn’t look more different.
This is the biggest difference between the average golfer and the tour pro.
Improving your sequencing alone will help you unleash significantly more power in your golf swing. It’s that important.
Step by step guide to the proper golf swing sequence
Below is a description of how to work on the sequence of the golf swing. It’s a long read, but it is very detailed. This is followed by a less detailed video description.
First, train this pattern without a club in your hand. This will make it easier to learn.
The Back Swing Sequence
The back swing is the most complicated part of the golf swing.
In regard to how the body moves, there are some basic fundamentals. The weight shifts modestly to the back foot as the shoulders and hips turn.
The arms must then lift, and to keep the club on a decent swing plane, there must be some rotation in the forearms.
I am not worried about the action of the wrists at this point, because I am only concerned with how the body is moving without the club in our hand.
In order to learn how to move the body properly in the back swing, I break it down into smaller parts as follows:
Weight Shift

Step 1
Starting from a standing position, with your feet shoulder width apart, and weight evenly distributed, I want you to simply shift your weight to your back foot.
As you do this, be sure to flex the knee slightly as you shift the weight onto that leg.
Also, try to maintain the tension on the inside of your leg, rather than shift the weight too much so that the weight gets outside of your back foot.
Do this a few times, then move on to the next step.
Weight Shift, Then Turn the Hips
Unfortunately, here is where things get complicated. Yes, believe it or not, adding a turn in the hips, AFTER the weight shift is problematic for some people, and this is the first reason why people struggle with swinging a golf club.
Once you have shifted your weight onto the back foot, I simply want you to turn the hips, up to a 45 degree turn. It is ok to let the shoulders and the head turn with the hips at this point.
Unfortunately, some people are unable to turn the hips with a LEVEL rotation. Some, instead, tilt the hips. This is what causes a reverse pivot in some golf swings, or a change in spine angle in others.

Step 2
When you turn the hips after shifting the weight, you should maintain the knee flex in the leg you are shifting the weight onto. You should feel the weight inside your back heel, inside the thigh and in the glute.
For a right handed player, this would be the right heel, right thigh and right glute. Also, do your best to not lean either way with your upper body.
Repeat this sequence at least five or six times. If you struggle with it, then keep doing it until you get it right. Remember, shift the weight first, then turn the hips.
Shift Weight/Turn Hips at the Same Time
Ok, now we are going to start mimicking the golf swing a little bit.
In the swing, we don’t do things piecemeal. There is a flow, and everything starts together.
At the beginning of the swing, the shoulders start turning, the weight starts shifting and the hips start turning as we take the club away from the ball. At this point, we are not yet concerned with the upper body.
So, as you shift your weight onto the back foot, turn your hips at the same time. Again, be sure the turn of your hips is level. There should be no tilt in the hips at all.
Also, be sure that your weight does not shift outside your back foot. Your back knee should not point outward much at all. You want to feel as if the back leg is being used as a brace, and therefore, you should keep the weight to the INSIDE of the leg.
Again, feel the weight on the inside of the back heel, inside the thigh and in the glute. Be sure to hold the position for a few seconds to get the right feel.
Golf Posture Shift weight/turn hips

Step 3
Now that you are beginning to get a good weight shift and hip turn all at once, it’s time to get into the golf posture.
Without getting into too much detail at this point, just get into a comfortable, athletic position where the knees are flexed slightly and you have a slight bend at the waist.
I would also suggest holding onto a basketball at this point as well. This will be used in the next few moves.
Let the arms hang naturally under the shoulders with your hands holding onto the ball.
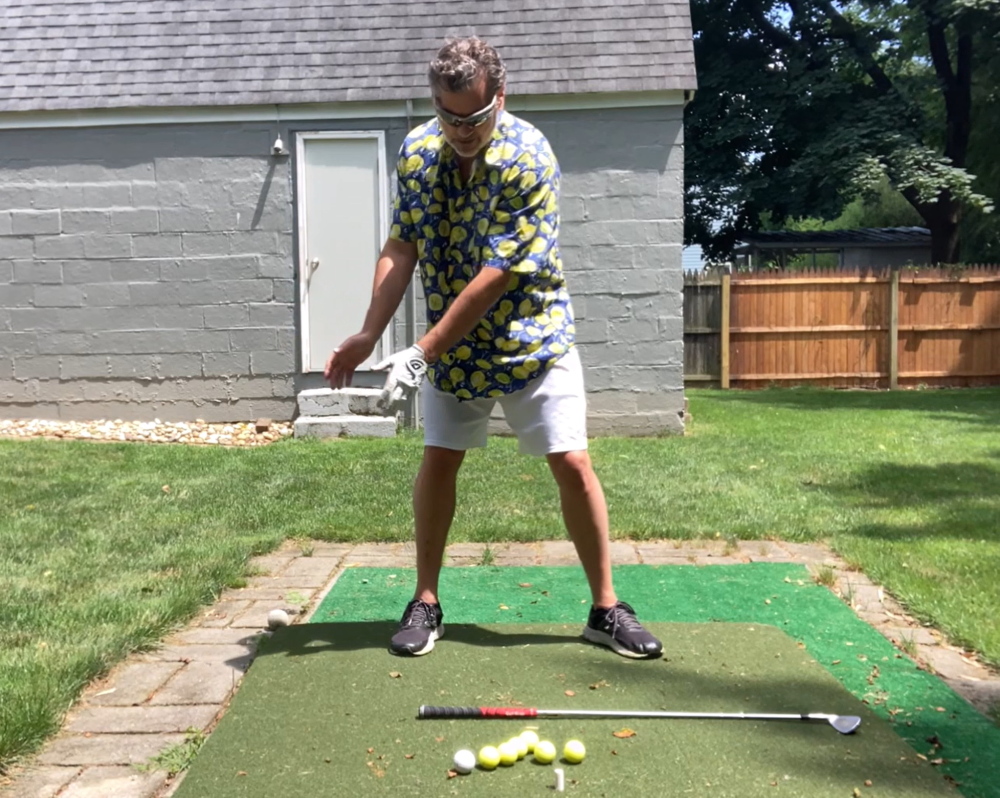
These photos show the balanced, athletic stance with the ball, and then the weight shift and turn.
The shoulders have turned as well, and now the center of my chest is essentially over my back foot.
Shift/Turn, Lift the Arms

Step 4
Uh oh, now we are starting to really complicate things.
This is where most beginner students, or golfers with significant difficulty maintaining the spine angle struggle. As soon as we start to lift the arms, things go awry!
This is where flexibility issues may come into play, or some issues with core strength.
Many people are tight in the shoulders, and have trouble lifting their extended arms above shoulder height.
They then compensate by tilting their hips which results in the back shoulder rising above the front shoulder, and their spine leans toward the target.
This is the reverse pivot.
Now the student is in a poor position to make consistent contact with the ball.

Step 5
Some students lack the core strength in the lower and middle portion of the back.
They are unable to maintain their spine angle when trying to lift the arms.
They then straighten up in the back swing, which means now they must change their spine angle again in the downswing in order to hit the ball.
This also leads to inconsistent ball striking.
In this drill, it is not necessary to lift the arms above shoulder height.
Most people can get them to exactly shoulder height and that is fine.
The whole point to this drill is to be sure that the spine angle does not change.
Shift/Turn/Lift and Rotate

Step 6
The final piece to the back swing puzzle is the rotation of the forearms.
This mimics what happens in the golf swing with a club in our hand. At the top of the back swing, the left hand (for right handed players) should actually be on top of the ball, as seen in the photo.
If we were swinging a golf club, the left hand would be on top and the club may actually feel like it is resting in the palm of the right hand.
In order to get a solid foundation into moving the body properly, the student should piece these moves together as I have shown.
If there is one step in the overall move that proves difficult, more time should be spent on that step before combining them into one swing.
We have now completed the back swing, and now for the easy part!
The Downswing Sequence

Step 7
Actually, most golfers try to make the downswing far more complicated than it needs to be.
This is because they are trying to hit the ball, rather than just letting the club swing.
They end up out of sequence by leading with the upper body rather than the lower body. This leads to poor ball striking.
Once we reach the top of the back swing while swinging the ball, the next move starts by shifting the weight, from the ground up, from the right foot into the left foot.
The left hip will shift a little toward the target as a result. As this occurs, the arms simply start to drop.
Unfortunately, most people want to turn the shoulders too much at this point, when in fact there is little shoulder turn at all from the top of the back swing at this point.
We simply turn the shoulders in the downswing to impact, as much as we did in the back swing.
At impact, the center of gravity has dropped a bit since the top of our back swing.
Our weight has shifted almost entirely to the front foot and there should be flex in the front knee.
The hips at this point are turned a little past the original set up position, and the back of the left hand should be square to the target.
Notice how my chin is pointing straight at the center of the ball in the impact position.
The key to this exercise is to learn how to move the body from the top of the back swing into impact.
The bottom line is that the lower body does the bulk of the work, and the upper body just follows.
Follow Through

Step 8
The follow through move is simply a further rotation of the hips as a result of the momentum carried in the downswing.
It is no less important, however, as the shape of the follow through can dictate the shape of the shot.
Ideally, after impact, we reach the point where we have the most extension with the arms. We then finish in a balanced position with all of our weight on our front foot.
There should be no arching of the back as in the old Reverse C position.
That is essentially how we train the body to move properly in the golf swing.
Taking the club out of our hands makes this quite a bit easier.
As I already indicated, this breakdown of the swing should be practiced daily until the student is able to perform each part of the swing well.
Then, the entire swing should be practiced with ball in hand before moving on to using a club.
In the video below, I provide a step-by-step guide to learning the proper golf swing sequence.
You can certainly work on this at home. If you enjoy practicing at home, here are a few products I recommend…
Garmin Approach R10 launch monitor

